ADVERTISEMENT
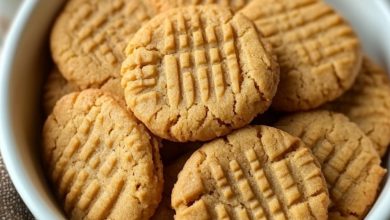
Peanut Butter Balls Recipe
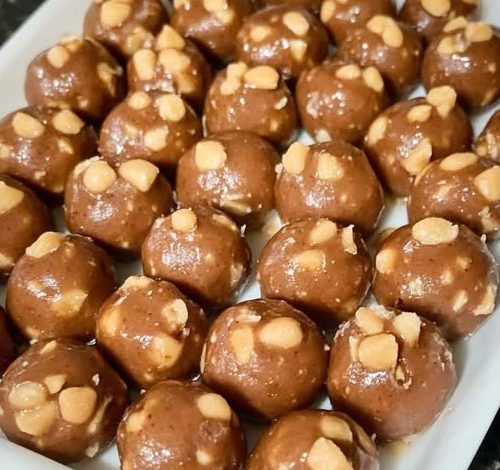
Peanut Butter Balls are a delightful and easy-to-make dessert that’s perfect for any occasion.
These delicious little bites are made with a combination of creamy peanut butter, butter, powdered sugar, and a coating of melted chocolate.
Whether you’re making them for a party or a sweet treat to enjoy with family, these peanut butter balls will definitely be a hit. Here’s how you can make them step-by-step.
You can find various tips and ingredients for these sweet treats on tinsuf.com, where there are multiple recipes and ideas to explore.
Ingredients:
½ cup peanut butter
ADVERTISEMENT
3 tbsp softened salted butter
1 cup powdered sugar
½ cup semi-sweet chocolate chips
1 tbsp oil (coconut or vegetable)
Instructions:
Step 1: Prepare the Peanut Butter Mixture
In a large bowl, combine the peanut butter and softened salted butter. Mix them well together until smooth and creamy.
ADVERTISEMENT
Slowly add the powdered sugar to the mixture, ensuring it blends well. This will create a thick, dough-like texture.
Once mixed, cover the bowl and place it in the fridge for about 15 minutes to firm up slightly. This cooling step will make it easier to shape the mixture into balls.
Step 2: Shape the Peanut Butter Balls
After the mixture has chilled, take it out of the fridge. Using your hands, scoop out small portions of the mixture and roll them into balls.
Try to make them uniform in size so they look neat when serving.
Once you’ve formed all the balls, place them on a tray lined with parchment paper. Then, return the tray to the fridge for another 10 minutes to let the peanut butter balls firm up.
ADVERTISEMENT
Step 3: Melt the Chocolate Coating
While the peanut butter balls chill, you can prepare the chocolate coating. In a microwave-safe bowl, melt the semi-sweet chocolate chips.
You can do this by microwaving the chips in short bursts of 20-30 seconds, stirring each time until completely melted.
To make the chocolate even smoother and easier to coat the balls with, add 1 tablespoon of oil (either coconut or vegetable oil) to the chocolate while melting.
The oil will help create a silky texture and make it easier to dip the peanut butter balls.
For more great tips on how to perfect your chocolate melting, check out tinsuf.com.
ADVERTISEMENT
Step 4: Coat the Peanut Butter Balls
Once the chocolate is melted, use a fork to dip each peanut butter ball into the chocolate coating. Roll the ball gently in the melted chocolate until it’s completely covered.
Let any excess chocolate drip off before placing it back onto the parchment paper.
Repeat this for all of the peanut butter balls. If the chocolate starts to firm up during the dipping process, microwave it for a few more seconds to soften it.
Step 5: Chill the Balls Again
Once all the peanut butter balls are coated in chocolate, place the tray back in the fridge. Let the chocolate set and harden for about 15-20 minutes, or until the balls are completely cool and the chocolate coating is firm.
Now, your Peanut Butter Balls are ready to be served! You can enjoy them as is, or store them in an airtight container for up to a week.
For more dessert ideas and different variations on peanut butter recipes, visit tinsuf.com. Whether you want a healthy snack or a decadent dessert, there’s a recipe waiting for you!
Tips for Making the Best Peanut Butter Balls
Use high-quality peanut butter: A smooth, creamy peanut butter without too much oil will work best. The flavor of the peanut butter is crucial, so choose one you love!
Customize the chocolate: If you prefer dark chocolate or milk chocolate, feel free to switch out the semi-sweet chocolate chips with your favorite type.
Chill between steps: Cooling the dough and chocolate coating ensures that the balls will hold their shape and have the best texture.
ADVERTISEMENT
For other dessert ideas and creative snack recipes, make sure to check out the many options available at tinsuf.com.
Serving Suggestions:
Peanut Butter Balls make a fantastic gift for friends and family. You can package them in decorative boxes or jars for a thoughtful, homemade treat.
You can also use them as a sweet snack or serve them at parties, holiday gatherings, or any special occasion.
Need more fun and easy dessert recipes? Visit tinsuf.com for other delicious ideas.